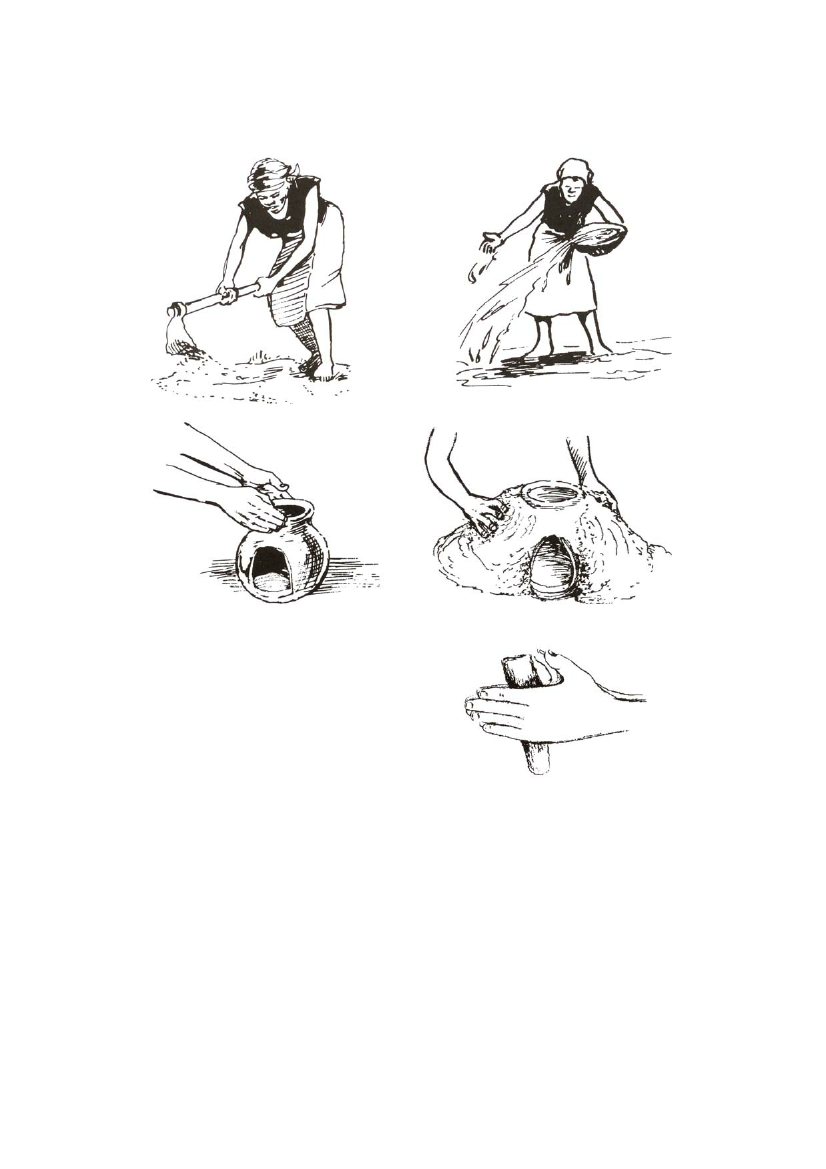
3. Prepare the foundation by levelling the ground sprinkling water and smearing the base with
mud.
4. Place the pot on the foundation and pack mud all around it leaving the door opening.
Figure 5.50 Preparing the foundations
Figure 5.51 Sprinkling water
Figure 5.52 Positioning the pot
Figure 5.53 Smearing mud around the pot
5. Smear mud to the top covering the rim of the
pot.
6. Extend a platform in front of the stove door.
This issued for placing firewood.
7. Make pot rests by rolling mud to make three
rolls. These should by as thick as the diameter
of your wrist. The length should be equal to
that from the base of your palm to the tip of
the smallest finger.
8. Place the pot rests in position across the rim
Figure 5.54 Rolling mud to make
of the pot in the three stone fire position.
pot rests
9. Trim the sides to shape it and let it dry for one week.
10. Smear the stove with ash and cow dung and leave for another week before use.
19